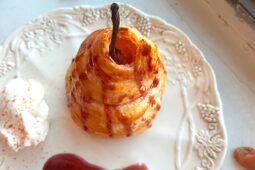
A decadent dessert with ripe pears poached in seasoned port, stuffed with caramel, and wrapped in puff pastry. Serve them hot, golden, and sizzling with a side of ice cream!
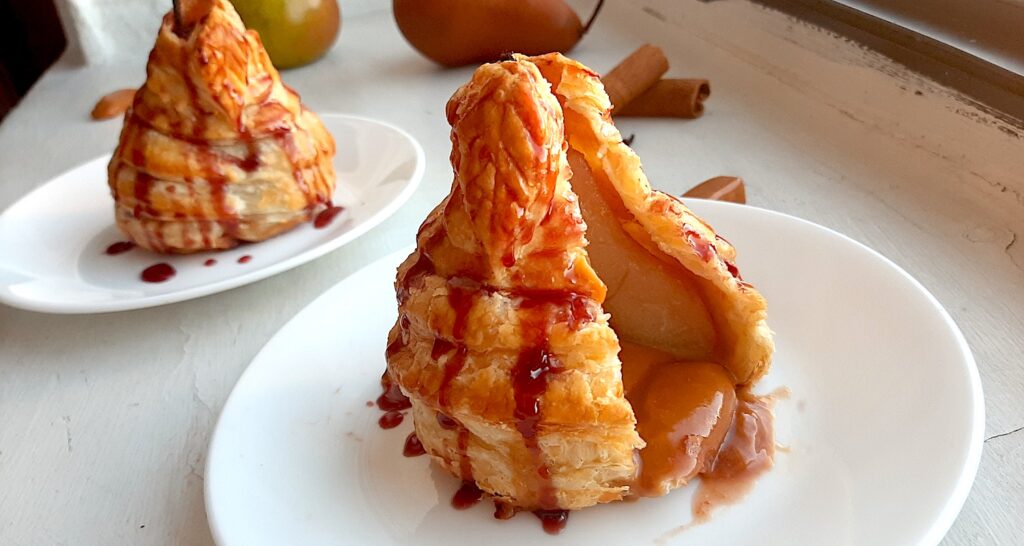
It’s pear season again! The perfect winter fruit.
A pear, to me, is everything an apple should be. It’s firm yet juicy. Delicate yet full of flavor. It can be creamy and crisp at the same time.
I just had to come up with a dessert that dressed up this fruit in the most elegant way possible.
Looking for a winter dessert that takes less effort? Try this Sweet Persimmon and Candied Ginger Galette. Gorgeous, easy, and quick!
TL;DR:
- Wash pears and slice the bottoms off so they stand flat.
- Peel pears and scoop out center seeds with a spoon.
- Defrost puff pastry according to packaging.
- Pour port, water, sugar, and spices into a large pot.
- Add in peeled and cored pears.
- Bring to a boil. Reduce heat and simmer for 20 minutes. Turning often to distribute color.
- Slice puff pastry into 4 squares (2 inches wide) and 12 long strips (½ inch wide)
- Remove pears and let cool.
- Keep 1 cup of the liquid, simmering over low heat until reduced by half. Set aside.
- Fill pears with 3-4 soft caramel candies.
- Place the bottom of a pear on one of the squares. Fold the sides up around the base.
- Starting at the base, wrap strips of puff pastry around the pear, using egg wash as glue if needed
- Bake in a 400°F oven for 20 minutes or until golden and puffy
- Serve immediately with ice cream, whipped cream, and sauce.
How to Make Port Poached Pears in Pastry
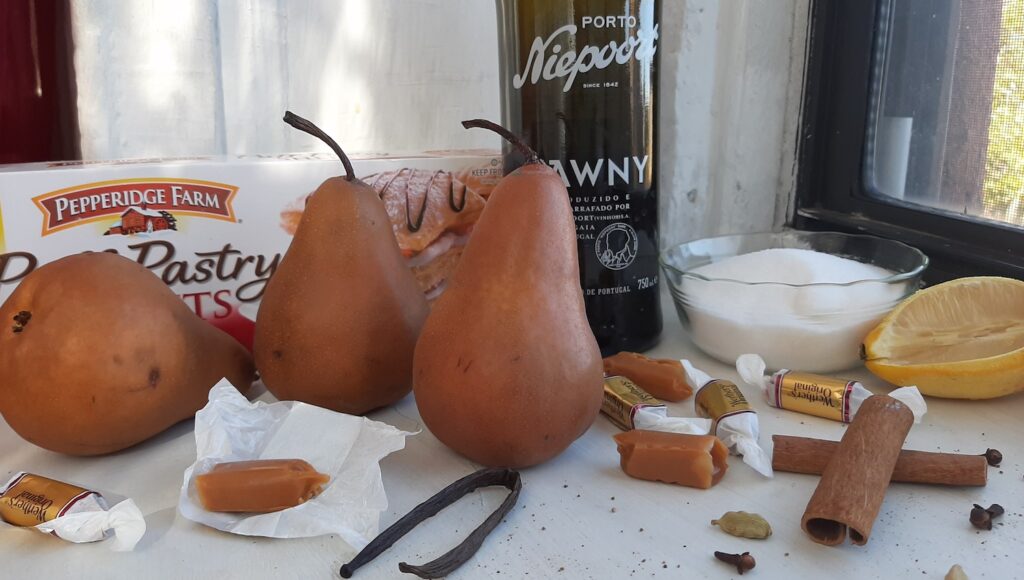
This recipe requires a bit of time and effort. That said, it’s quite fun to put together and the result is so elegant!
Prepping the Pears
Step 1 is simple: slice the bottoms of pears so they stay flat.
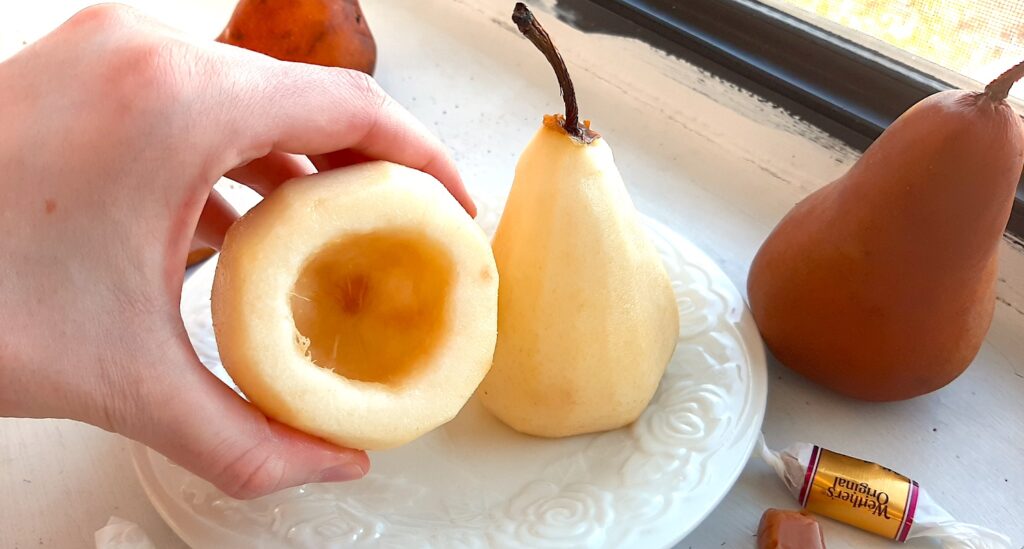
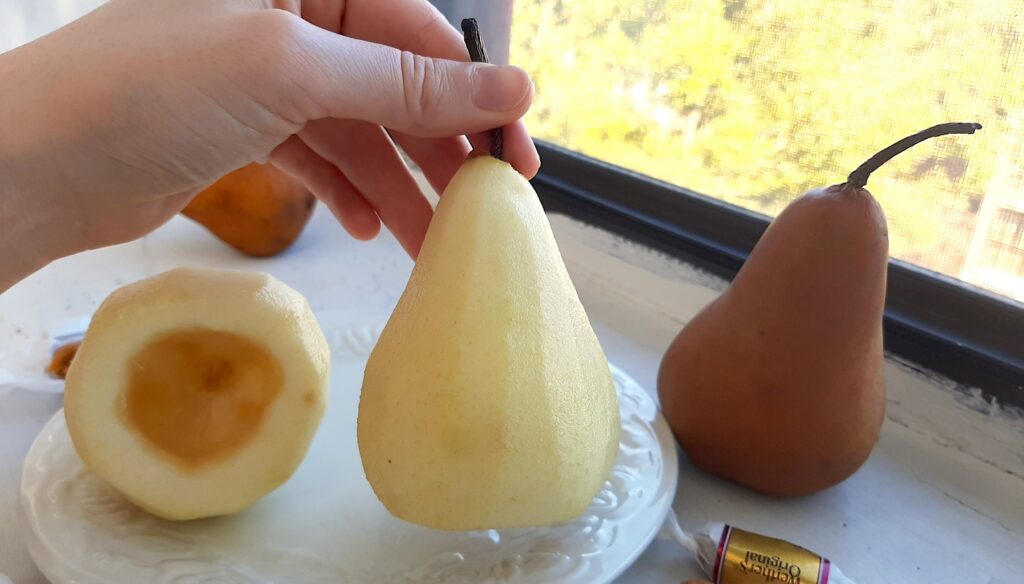
Step 2 is just as easy: the pears need to be peeled and the seeds removed.
If you have a vegetable peeler, that works perfectly.
Otherwise a very sharp knife will do the trick. (Try not too cut away too much of the flesh with this method! You won’t want the pear to lose its structural integrity. What a fun phrase.)
Then just take a spoon and carefully scoop out the seeds and core from the bulb of the pear. Don’t go too high up into the pear though. You don’t want to risk removing the stem.
I do not recommend using a corer for this recipe. You don’t want to remove the entire inner structure of the pear from end to end. You’re just scooping out the seeds to make a small hole in the main body of the pear.
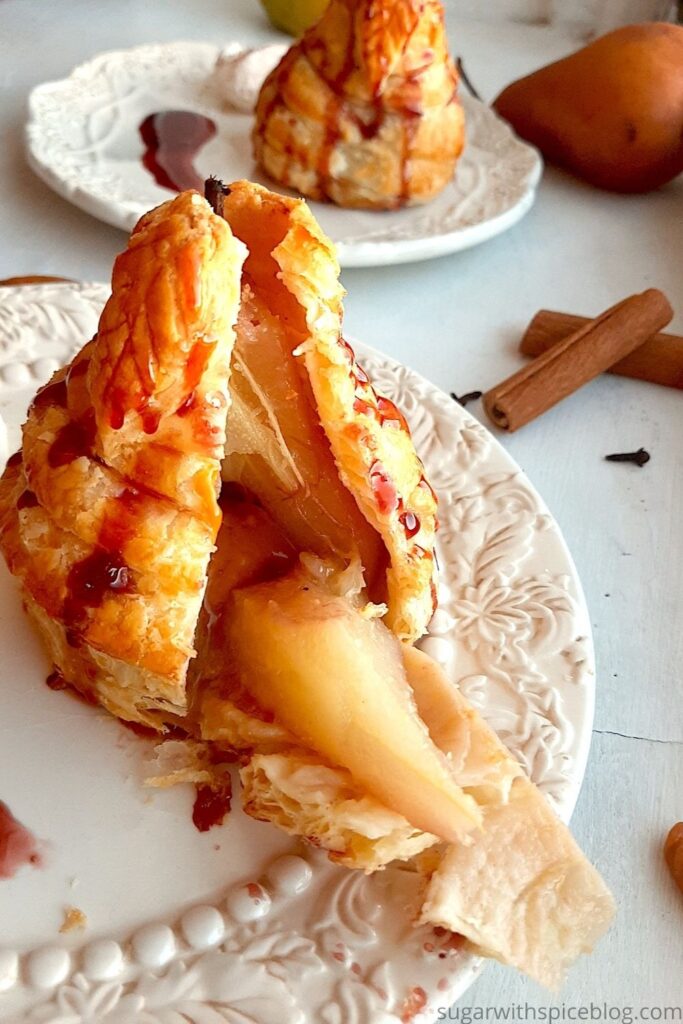
What Pears to Use?
I prefer Bosc pears for this recipe since they tend to be firmer and retain their crisp structure even when heated.
You can also use ripe Anjou pears as they are relatively crisp.
Don’t use Bartlett or Comice pears. These varieties are much softer and tend to lose their shape and turn to mush when cooked.
Prepping the Poaching Liquid
First, what is poaching? When you poach a food, you’re submerging it in hot liquid to cook it. The difference between boiling and poaching is that poaching is done at a relatively low temperature.
Poaching not only cooks the pears, it also fills them with flavor. So let’s get into what flavors you’re adding!
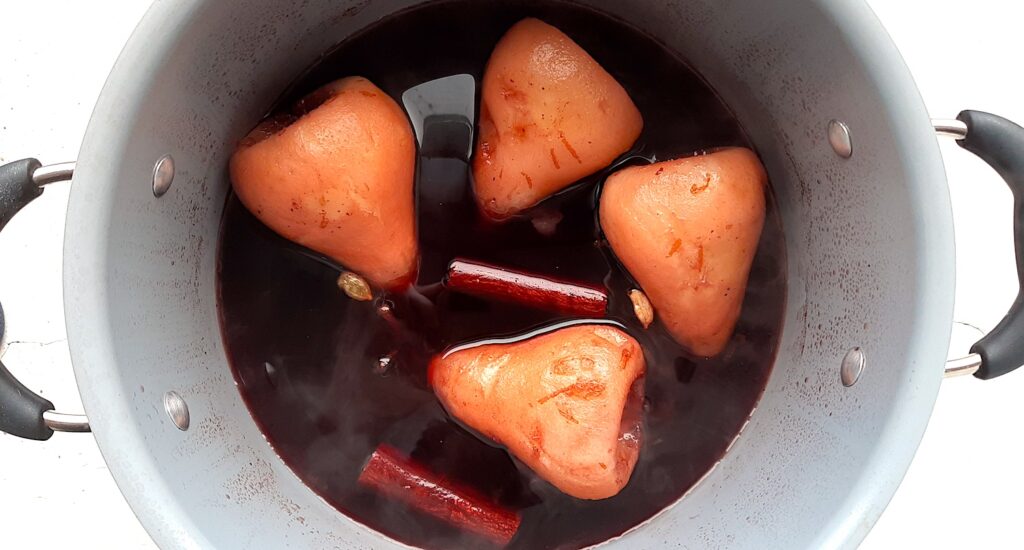
What Port or Wine to Use?
I always opt for Tawny Port when poaching pears.
Port is a fortified wine made by adding additional alcohol into the fermentation process. This means you tend to end up with a sweeter wine and really unique flavors.
Tawny in particular is aged in oak for a minimum of 3 years. So they adopt characteristics like caramel, cinnamon, cloves, and milk chocolate…all perfect for pairing with pears!
You can find decent ruby or tawny port in your grocery store in the under $20 range.
But if you’re struggling to find it, you can use red wine instead. Just remember if you’re using a dry red wine, you’ll need to double the sugar to make up for the lost sweetness in the wine.
Sweetener
Port is already quite sweet, so you won’t need to add as much sugar as you would in a regular red wine poach.
I stick with just half a cup of sugar. There are so many other flavors involved in this recipe, keeping the sugar simple is the best choice.
But you could also try the same amount of honey or maple syrup.
Acid
To keep the poaching sauce from becoming cloyingly sweet, add just a bit of acid.
A fruity acid like lemon or orange juice works best in this recipe. Remember to add the zest in as well to really get the fruit flavor.
Seasonings
This is the area where you get to have some creativity! I chose my favorite winter spices.
Keep in mind your base is a pear, so choose flavors that “pear” well. (Going to crawl back under my rock now.)
Cinnamon and vanilla are good staples to throw in. Below are some of my favorites, but feel free to choose your own!
Good seasoning options:
- Cloves
- Cardamom
- Nutmeg
- Allspice
- Anise Seed
- Fennel Seeds
- Cayenne Pepper
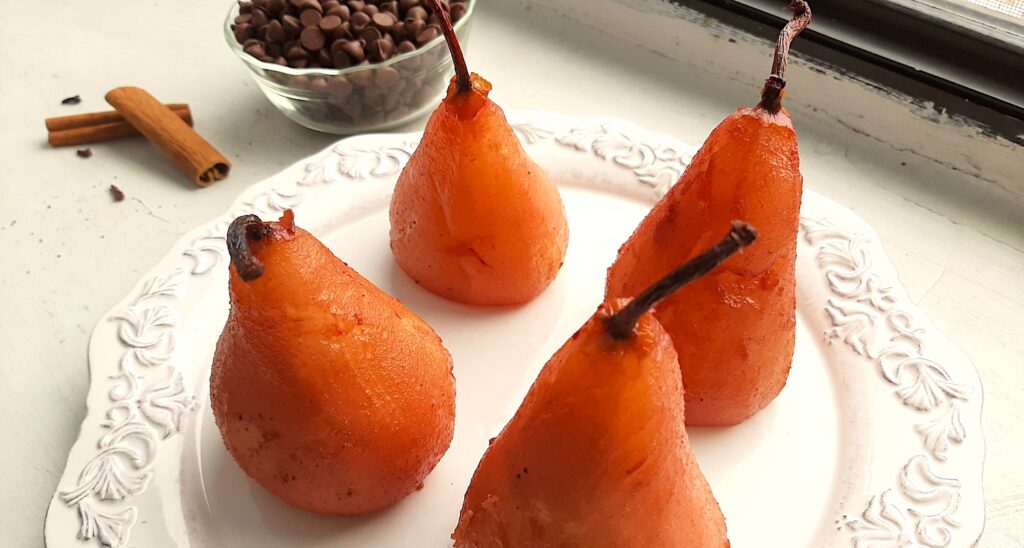
Poaching your Pears
You’ll be poaching your pears covered so the flavors will really sink into your fruit.
Remember to bring your poaching liquid to a boil and simmer for 10 minutes first so the flavors mingle before your pears even enter the picture.
While poaching, turn your pears every 7 minutes so they even color (and flavor) distribution on all sides.
Prepping the Pastry Dough
Follow the instructions on the box regarding defrosting and handling your dough.
Mine recommended defrosting for 40 minutes until easy to handle. And advised not to let the pastry get too warm. So work fast!
You’ll need:
- 4, 3-inch squares
- 12 ½-inch wide strips
- *optional* 4 leaf shapes
The squares are easy. Just make sure you cut them big enough to cover the base of the pear and fold up the sides too.
I find about 3 strips of pastry per pear was my average. If you have smaller or larger pears, you may need to cut more strips. Cut your strips long-ways and keep them within ½ inch wide. This makes them easier to handle and wrap tightly around the pear.
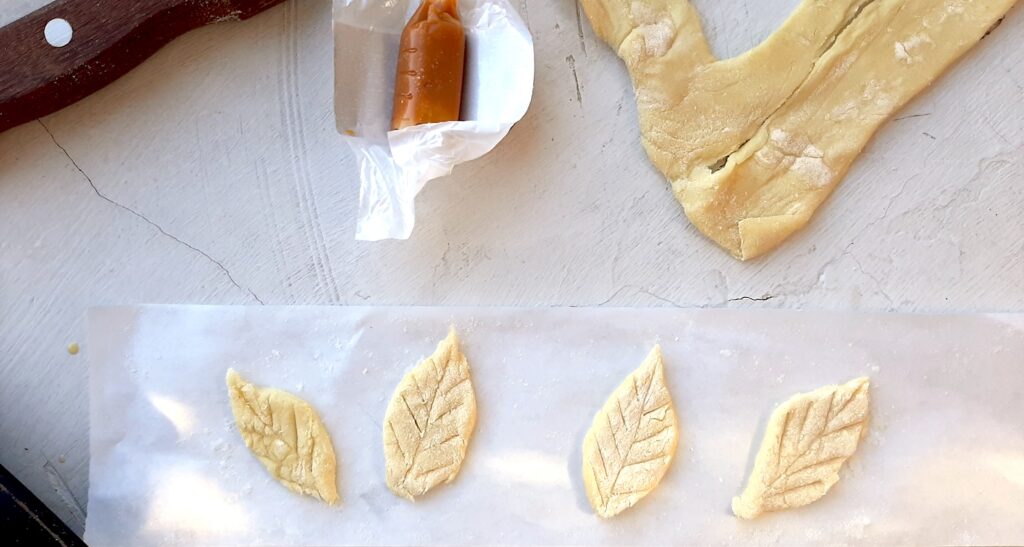
Leaf shapes are totally options but totally adorable. I just free-styled mine with a sharp knife. The trick is to create a tear-drop shape. But instead of rounding the bottom, draw it out into another point. I start at the top; cut one side; then go back to the top and cut the second side to match.
Create the “stem” and “veins” with some light pressure from your knife. (Remember to brush some egg wash on these as well so they get toasty too!)
Stuffing the Pears
Once you’ve poached your pears, cool them for a few minutes before you go trying to handle and stuff them.
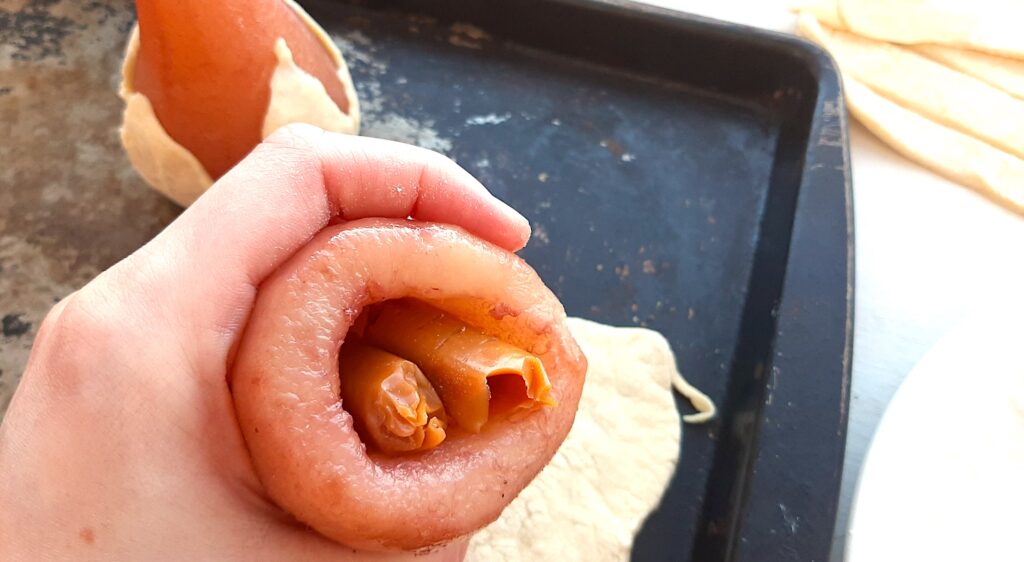
I chose to stuff mine with soft caramel candies. (Hard caramels take too long to melt. Stick with soft candies.)
Depending on the size of your pear, you can fit 2-3 candies inside.
I do not recommend using caramel sauce. It will go everywhere! Puff pastry can’t keep it from leaking out of your pears.
Wrapping the Pears
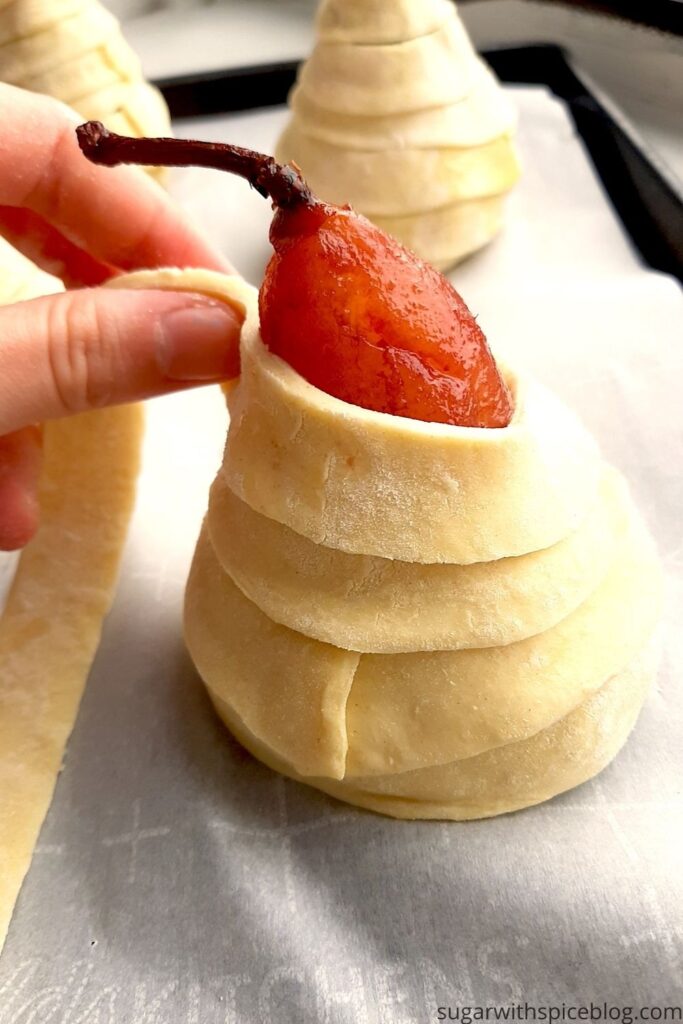
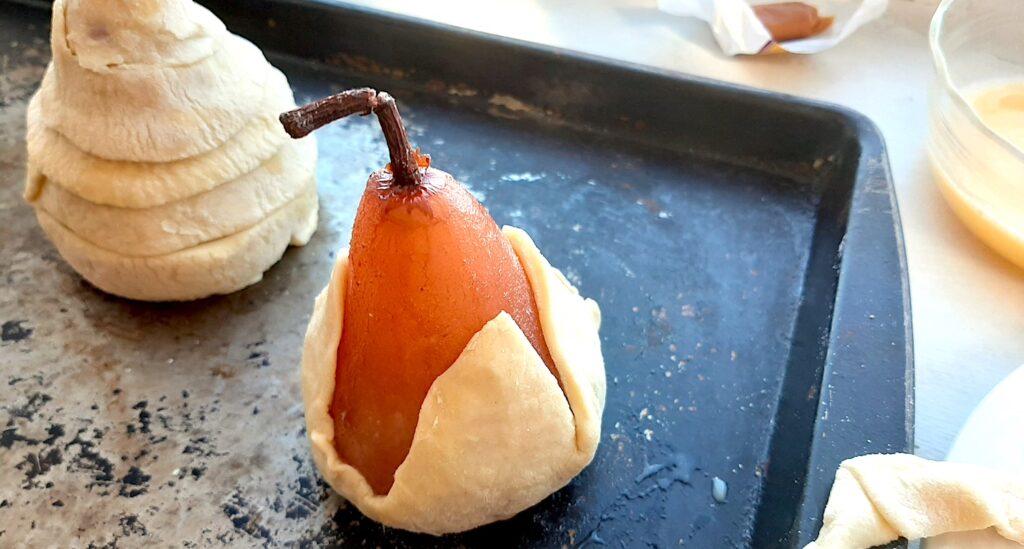
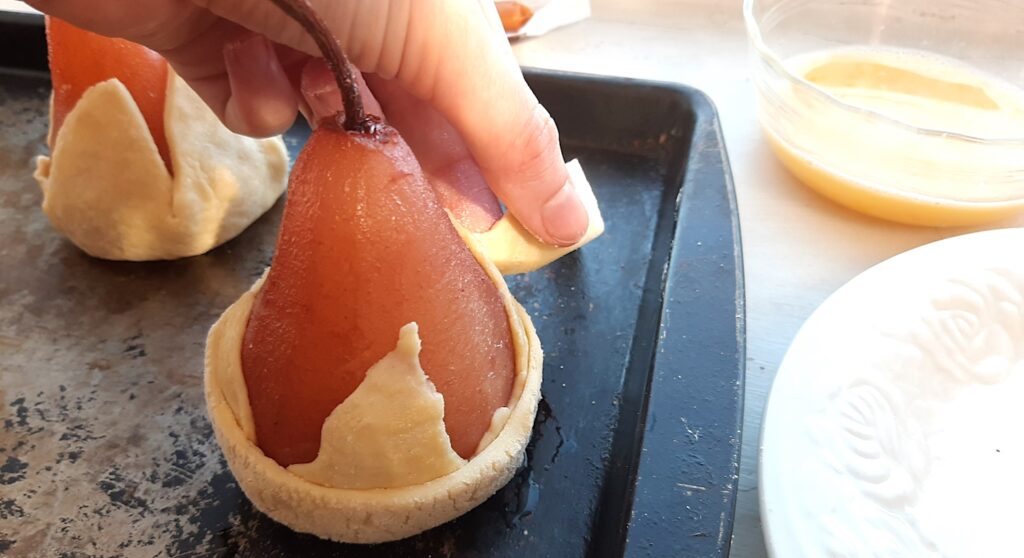
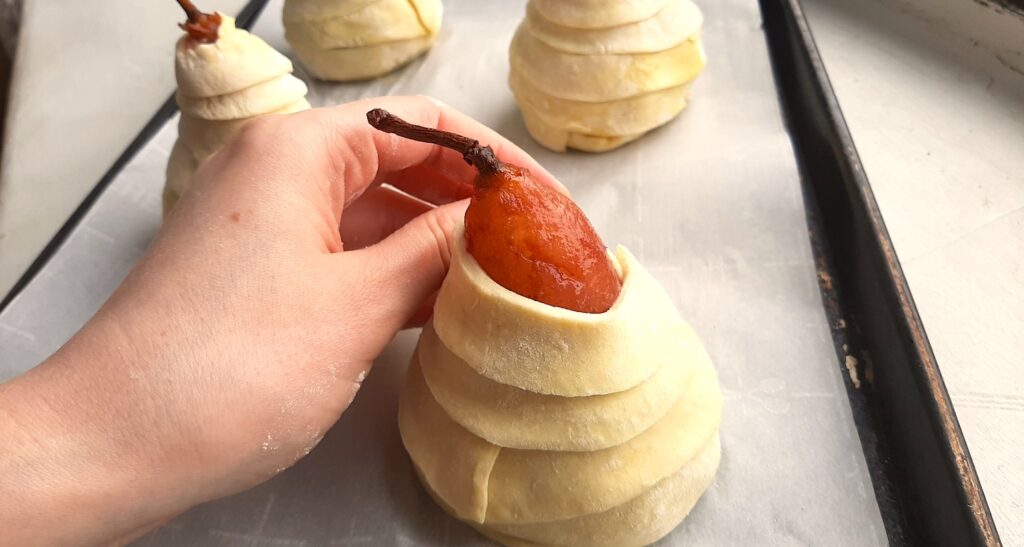
You’ll start by sealing your caramels into your pears. Place your stuffed pears onto your four pastry squares. Pull all the edges up and seal them onto your pear to keep the caramels in. (Your pear will be sticky from poaching, so the pastry will hold just fine.)
Brush the outside of the pastry with egg wash and then begin wrapping with your strips!
Starting at the base of your pear, very tightly wrap your strips around the pear and its bottom pastry in concentric circles, slightly overlapping each other.
Anytime you need to start another strip, just use a little egg wash as glue.
I use my fingers to apply the egg wash. With delicate pastries like this, a pastry brush just seems to send the egg wash everywhere.
When you reach the top, tuck the end of the last strip inside the most recent pastry circle. Seal with egg wash glue.
Brush the whole pastry with egg wash. Stick on your pastry leaves. (Brush them too.)
Then bake these little guys in the oven until they’re golden! Take them out as soon as they’re ready since you don’t want the pears to cook too long and lose shape.
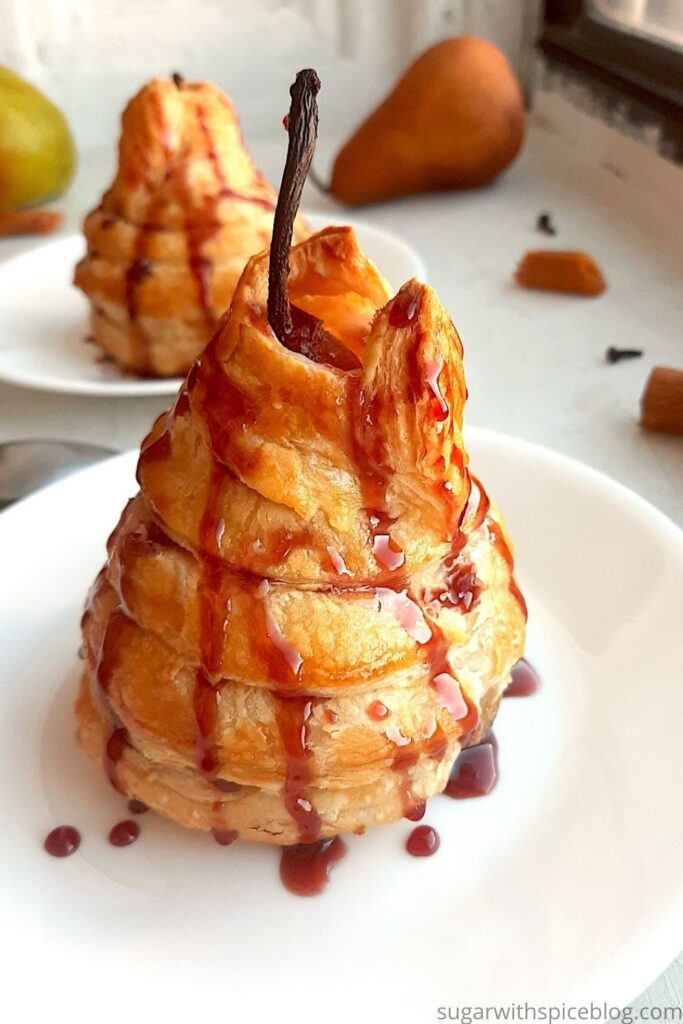
Do I need an Egg wash?
I say yes. Egg washes do two things. 1. They act like a glue and 2. They create that nice sizzling golden pastry look.
I know it’s a pain to whip up an egg and then only use a bit of it to coat a couple pastries.
If you’re worried about wasting food, you could always make scrambled eggs. Or throw the leftover egg into a recipe like this delicious Mushroom, Leek, and Bacon Quiche the next morning!
Substitutions and Variations
Port Wine
Dry Red Wine – Anything from a dry Cabernet Sauvignon to an off-dry Cabernet Franc would work here. I try to pick something that has a strong fruit-forward flavor to mimic the port.
Just remember to double the sugar content to make up for port’s sweetness.
Bosc Pears
Anjou Pears – The best substitute option as Anjou pears are typically fairly firm and crisp.
Apples – Just as common as pears in the fall and winter months. If you’ve got too many apples, poach ‘em! Though in general I find the flavor of sherry goes better with apples than port. You could try a mix of this caramel and puff pastry recipe with my spicy sherry poached apples!
Quince – Part of the apple and pear family but a relatively rare fruit to most grocery stores. If you’re lucky enough to find quince at a farmer’s market, give this a shot! They’ll need to poach for at least an hour to be soft and sweet enough to be eaten.

Caramels
Milk Chocolate – Milk chocolate tastes excellent with pears and tawny port. Replace the caramels with milk chocolate chips and lock them in with your puff pastry.
Nothing at all! – It’s also totally okay to not fill your pears with anything. The poaching sauce is quite rich and tastes very elegant on its own.
Feel free to just poach your pears, wrap them in pastry, and serve them without worry about leaky caramels!
Egg Wash
Water and Cream – Really against using a whole egg for a quick brush? Water works just as well to “glue” puff pastry together. You won’t get that same golden brown look. Instead, brush a splash of cream over each pastry to get a little bit of a brown color as it bakes.
What Wine to serve with Port Poached Pears?
Port! Obviously!
Tawny port pairs particularly well with pears. It’s got a hint of creamy vanilla caramel flavor.
This is a very rich dessert. So you can serve it with something like Champagne which will cut through all the sweet flavors and refresh your palate with every sip.
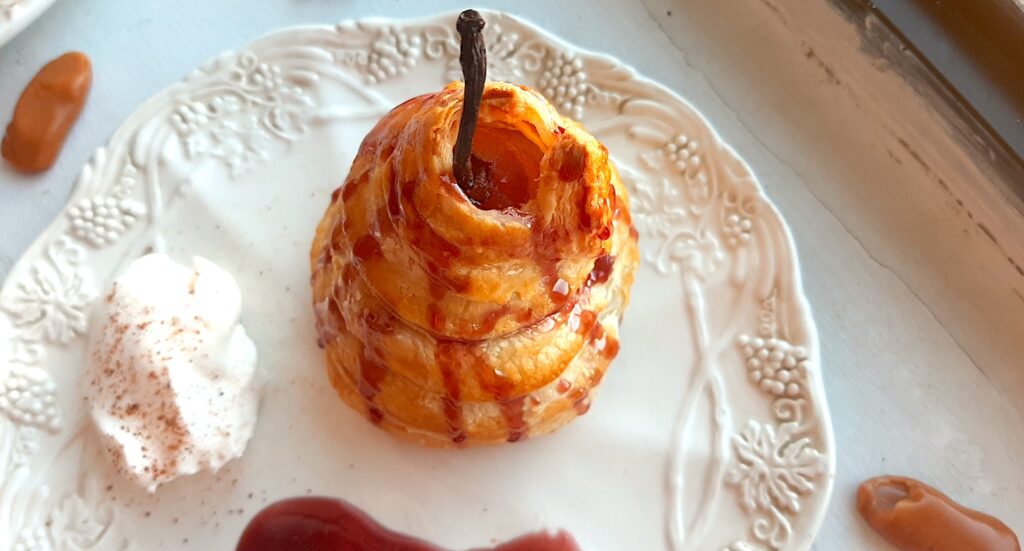
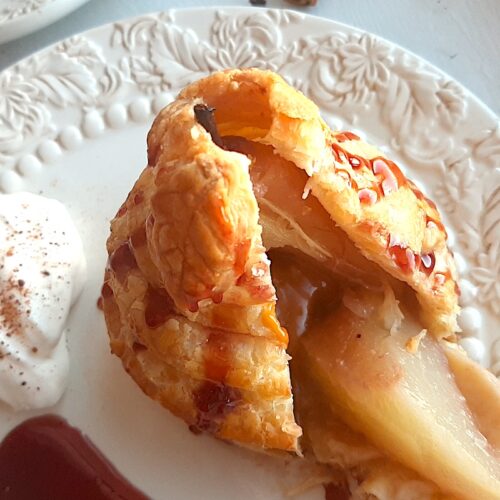
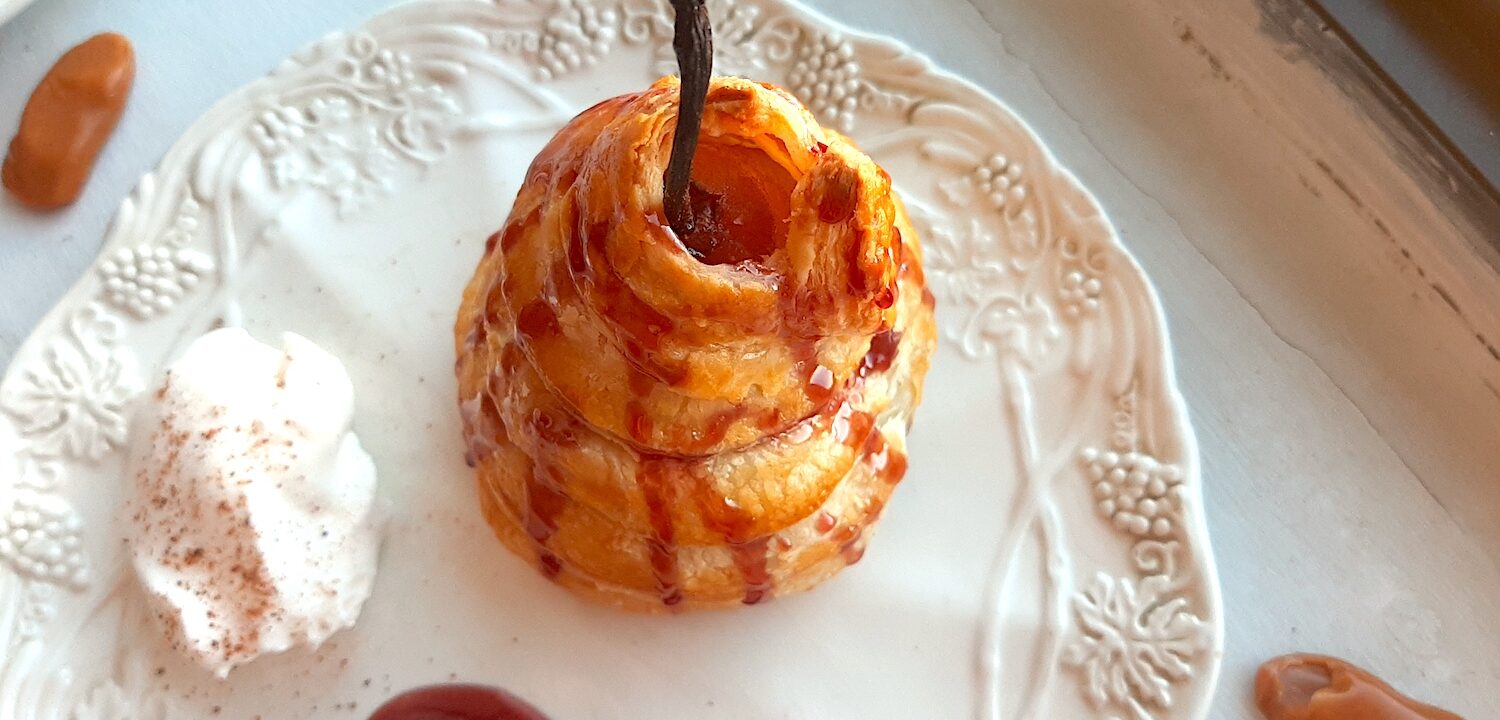
A decadent dessert with ripe pears poached in seasoned port, stuffed with caramel, and wrapped in puff pastry. Serve them hot, golden, and sizzling with a side of ice cream!
- 4 Bosc Pears *alternatives above
- 2 sheets Puff Pastry *defrost according to box
- 8-12 individual Soft Caramels
- 1 bottle Tawny Port
- 1 cup Water
- 1/2 cup Sugar**
- 1 Lemon zest AND juice
- 8 whole Cloves
- 2 Cinnamon Sticks
- 2 Cardamom Pods
- 1 Vanilla Bean***
- 1/4 tsp ground Nutmeg
- 1 Egg
- 1 tbsp Water or Cream
-
Remove pastry sheets from freezer and follow box instructions to defrost.
-
Slice the bottoms of each pear so they stand flat.
-
Using a peeler, remove the skin of the pears. Leave the stems attached.
-
Using a spoon, scoop out the bowl of the pear- removing core, seeds, and tough strings.
Do NOT use a corer. You'll remove the entire center, including the stem! Pears are soft enough that a spoon works well.
-
Pour port wine, water, sugar, lemon juice, lemon zest, and seasonings in a large saucepan or soup pot.
-
Bring to a boil. Then reduce heat to medium and simmer for 10 minutes.
-
Add in the 4 skinned, cored pears. Cover and simmer for 7 minutes.
-
Remove the cover. Turn the pears. Cover again and simmer for 7 more minutes.
-
Test the pears. If tender (but still firm) remove from the sauce with a slotted spoon and leave to cool for 10 minutes.
If still very firm, remove the cover and simmer for 5-7 more minutes, watching closely. Turn often to ensure even coloring. Remove when tender and cool for 10 minutes.
-
Preheat oven to 400°F. Cover a baking sheet with parchment paper.
-
Roll out pastry sheets. Cut 4 2-inch squares and lay on the parchment paper.
-
Unwrap 2-3 soft caramels and fit them in the bottom of the first pear. Place it on the first pastry square. Fold all edges of the square up around the base of the pear, locking the caramels inside. (Your pear will be sticky so the pastry should have no problem staying.)
Repeat for remaining 3 pears. Brush the exposed pastry with egg wash.
-
Slice the remaining pastry into strips lengthwise. Each strip should be around 1/2 inch wide.
-
Starting at the very base of the pear, wrap your pastry strips around the pear in slightly overlapping circles. The pastry should stick to the pear and the base pastry very tightly.
When one strip ends, use the egg wash as glue to help the pastry stick together and keep wrapping with a new strip.
When you reach the top of the pear, tuck the final edge inside the last circle. Seal with egg wash glue.
-
Brush all pears with egg wash.
-
*OPTIONAL* Cut small leaves out of pastry dough using a kitchen knife. Add the "veins" using a knife and brush lightly with egg wash. Use egg wash to stick the leaves on the top of each pear.
-
Bake in the oven for 20 minutes or until just golden and puffy.
-
Discard most of the poaching liquid, keeping about 1/2 cup.
-
Let simmer over low heat until reduced by half. Keep an eye on it so it doesn't burn.
When ready, you will need to use quickly as the sugar hardens as it cools.
-
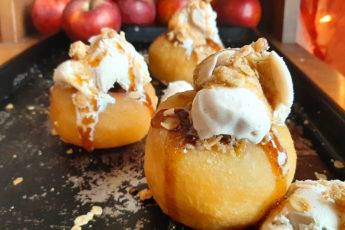
Drizzle over the baked pears and serve with a scoop of ice cream, whipped cream, or just in its own sauce.
** If using dry red wine, use 1 full cup of sugar to add sweetness.
*** Or 1 teaspoon vanilla extract
**** If not using egg wash, you’ll need cool water to serve as pastry glue!







Leave a Comment